Windows Login Agent
Installing the Windows Login Agent - Standalone
This method is good for organisations who are only protecting 1-10 machines with the login agent, or for POC or Testing purposes.
If the organisation is looking to protect more than 10 machines, SecurEnvoy recommends using the Mass Deployment installation method in section 2 of this document.
- Navigate to the Downloads section of the SecurEnvoy Access Management Administration Console.

- Download the Windows Login Agent Installer Package.

- Install the Windows Login Agent Installer Package to the desired target machine.

- Specify the language to use during the installation.

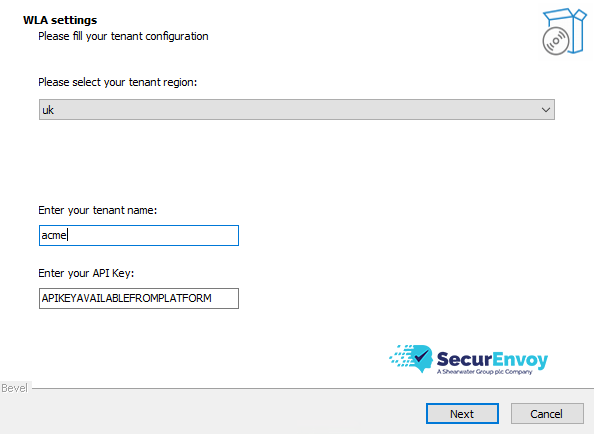
- Fill in Organisation Specific details for the SecurEnvoy Access Management Tenant.
Tenant Region This will be provided by SecurEnvoy and just needs to be selected from the dropdown list. The exceptions to this are on-premise installations which use the pre-configured certificate or a custom certificate and domain.
- "on-premises": (TENANT.access-mgmt.directory)
- "custom": Custom SSL Certificate for Access Management On-Premise (TENANT.COMPANY.com)
Tenant Name This is the tenant name of the Access Management Tenant. Organisations can find this information by navigating to "Organisation" > General Details > Tenant on the Access Management Administration Console.
API Key This is the API Key set up for the Windows Login Agent. If an API Key has not already been set by the organisation, please continue to the next step where API Key generation is shown.
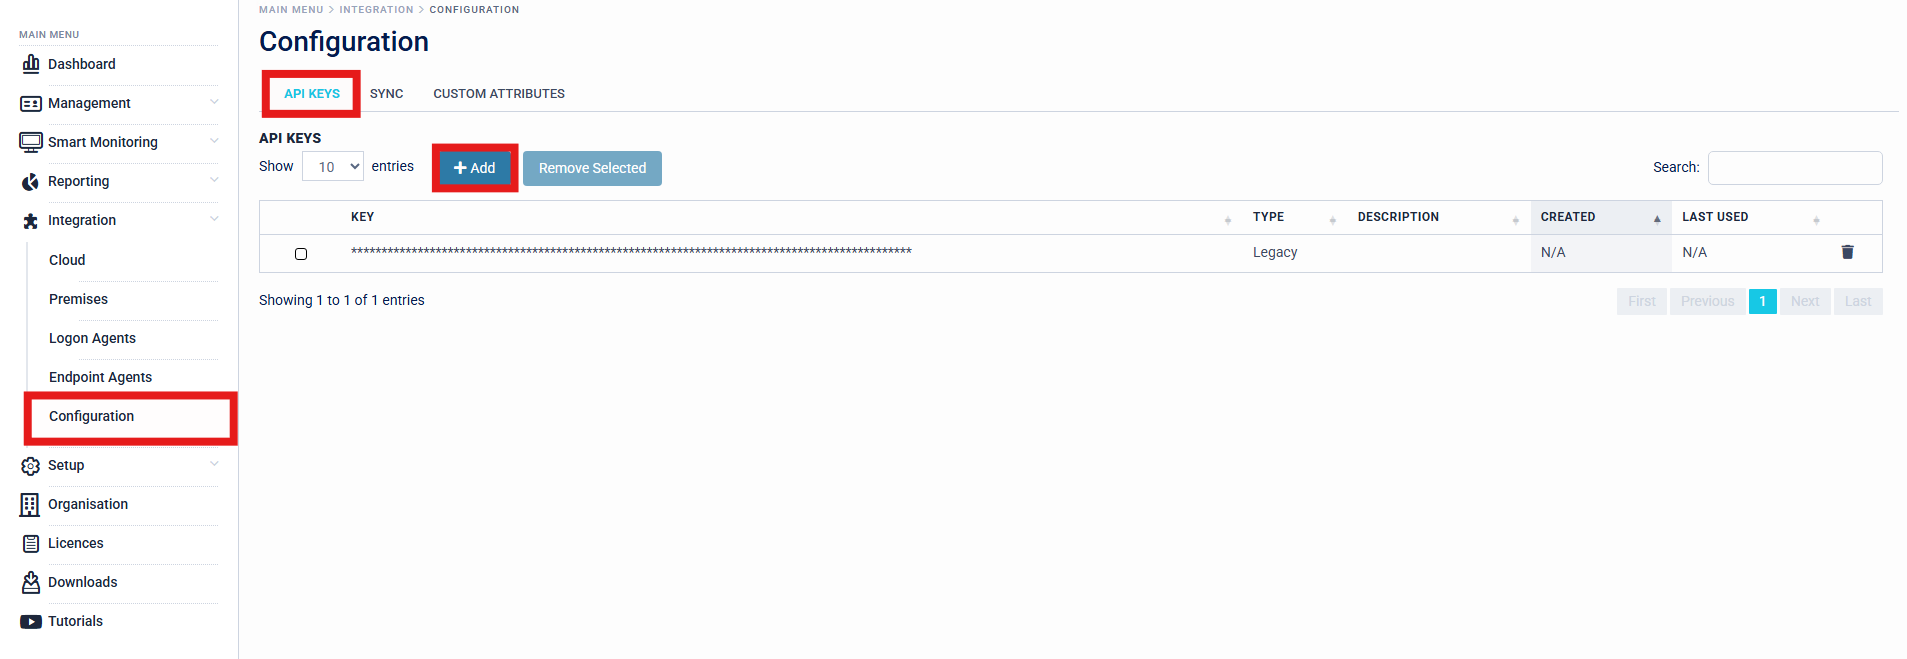
- Organisations are required to generate an API Key for all agents on the Access Management Platform. This can be generated by navigating to Configuration > API Keys > Add.
SecurEnvoy recommends that organisations create a separate API Key for each agent usage, for example - creating a separate API Key for the Organisations SingleAgent for LDAP Connectivity, and a separate API Key for the Organisations Windows Login Agents.
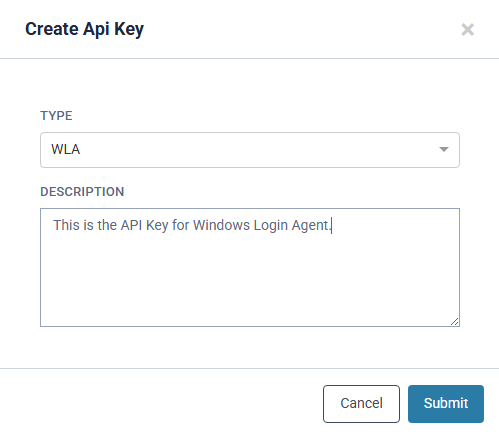
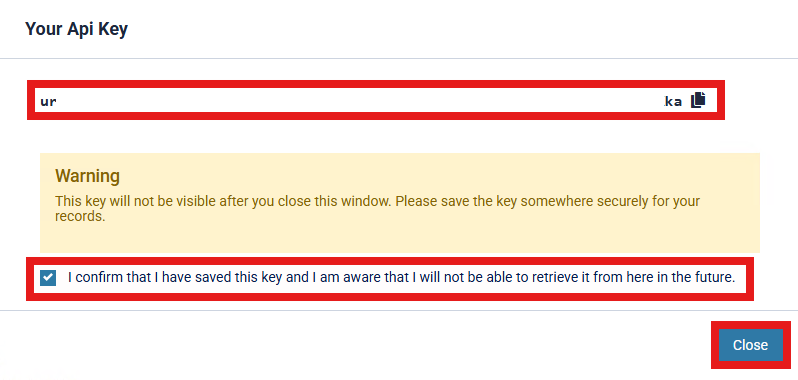
- Once the API key is generated, organisations should copy it and store it in a secure location for future access. Confirmation is required to ensure that the key has been saved and that organisations understand it will not be retrievable later.
Organisations are required to back up and save any API keys that are generated, as they cannot be recovered once the prompt is closed. If an API key is lost and cannot be retrieved, a new key will need to be generated and rolled out. It is therefore very important that these keys are securely backed up.
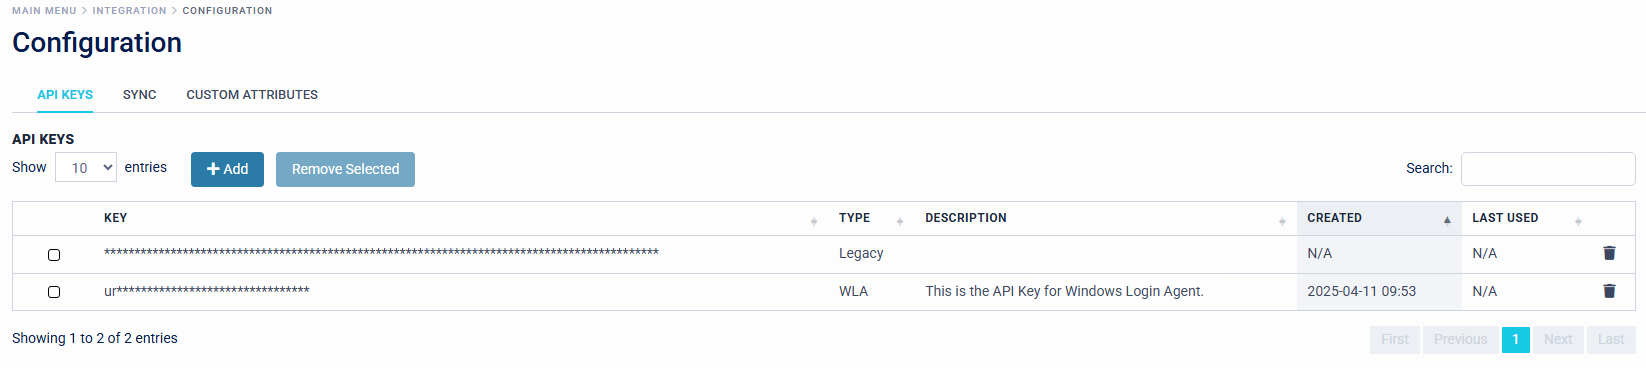
API Keys will be displayed in the Access Management Platform with "Type", "Description", "Created" and "Last Used" Information, to give Organisation Administrators an efficient view of API Key's in rotation across the estate.
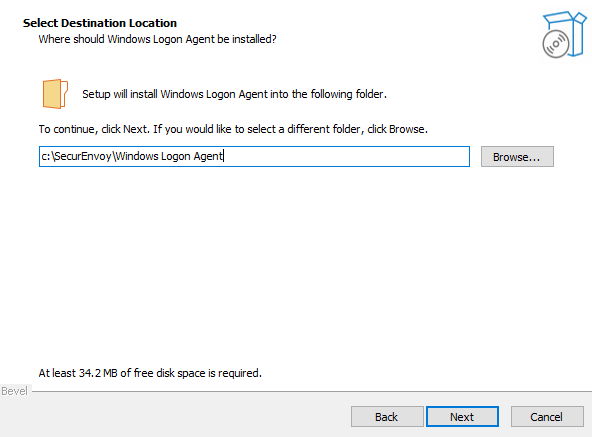
- Organisations are required to select a Destination Location for the Windows Login Agent to be installed. The default is "C:\SecurEnvoy\Windows Login Agent".
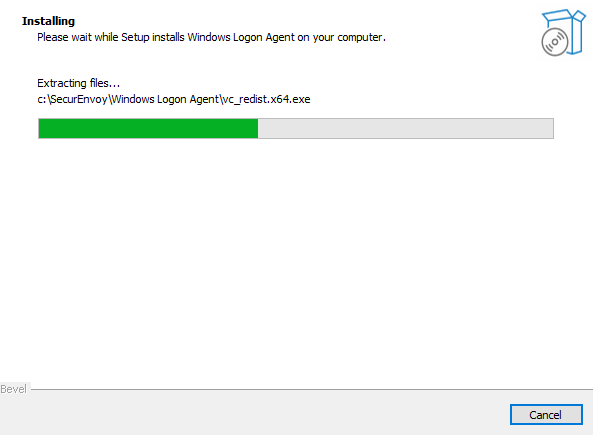
- Configuration is now complete and the setup is ready to begin installing the Windows Login Agent onto the target Machine.

- Installation will extract files to C:\SecurEnvoy\Windows Login Agent, and install Microsoft Visual C++ Redistributable, as this is packaged within the installer and a requirement for the SecurEnvoy Access Management Windows Login Agent.
- Once Installation is complete, the target machine must trigger the Login UI in order to register the Windows Login Agent to the Access Management Platform in the background. This can be achieved by signing out and signing back into the target machine, or restarting the machine.
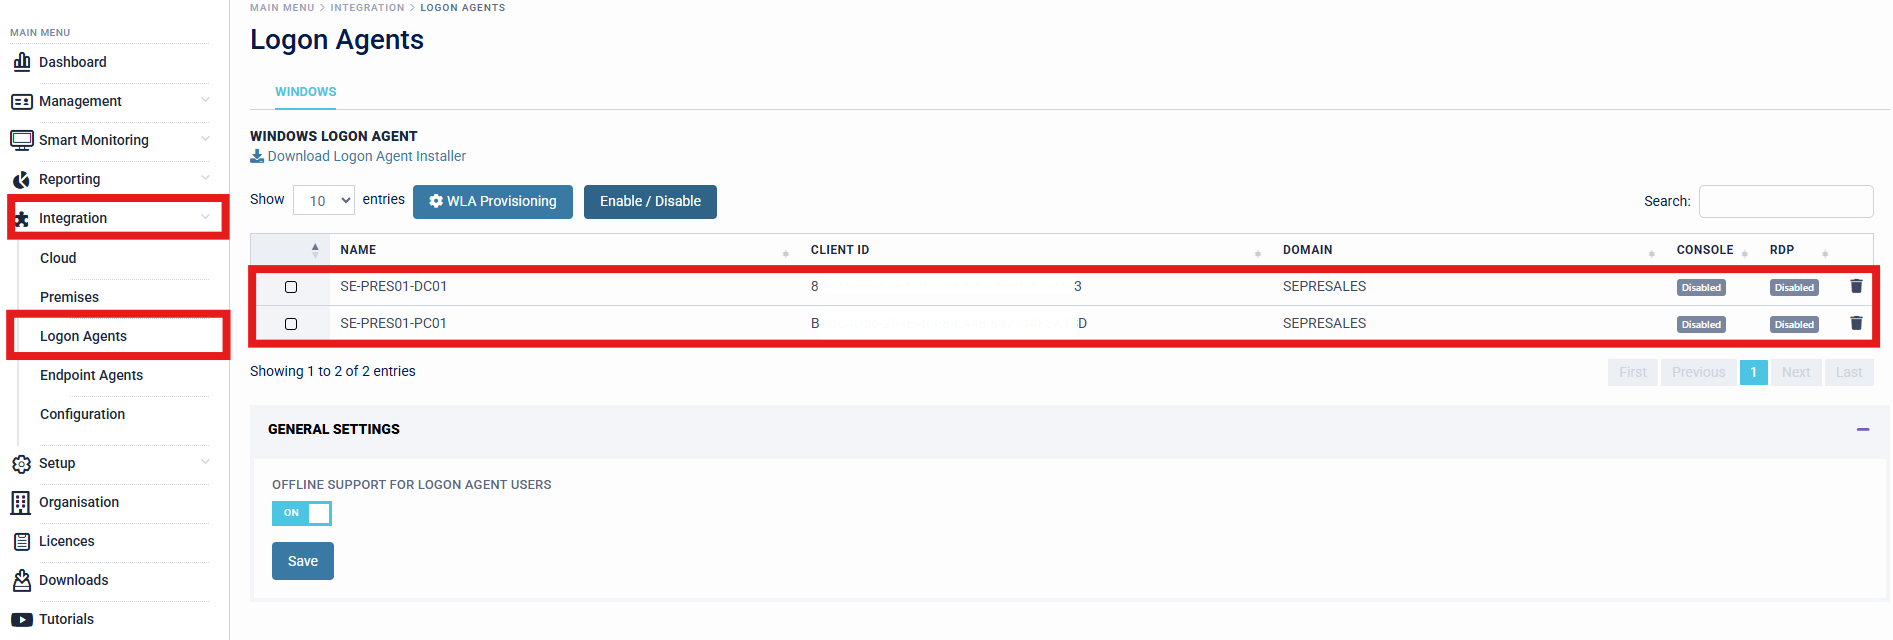
- After the target machine has triggered the Login UI, this will be registered on the SecurEnvoy Access Management Platform, ready for provisioning.

Installing the Windows Login Agent - Mass Deployment
This section will demonstrate how organisations can download, package and install the Windows Login Agent in a Mass Deployment Installation method. This method is good for organisations who are only protecting more than 10 machines with the login agent. If the organisation is looking to protect less than 10 machines. SecurEnvoy recommends using the Standalone installation method in section 1 of this document.
- Navigate to the Downloads section of the SecurEnvoy Access Management Administration Console.
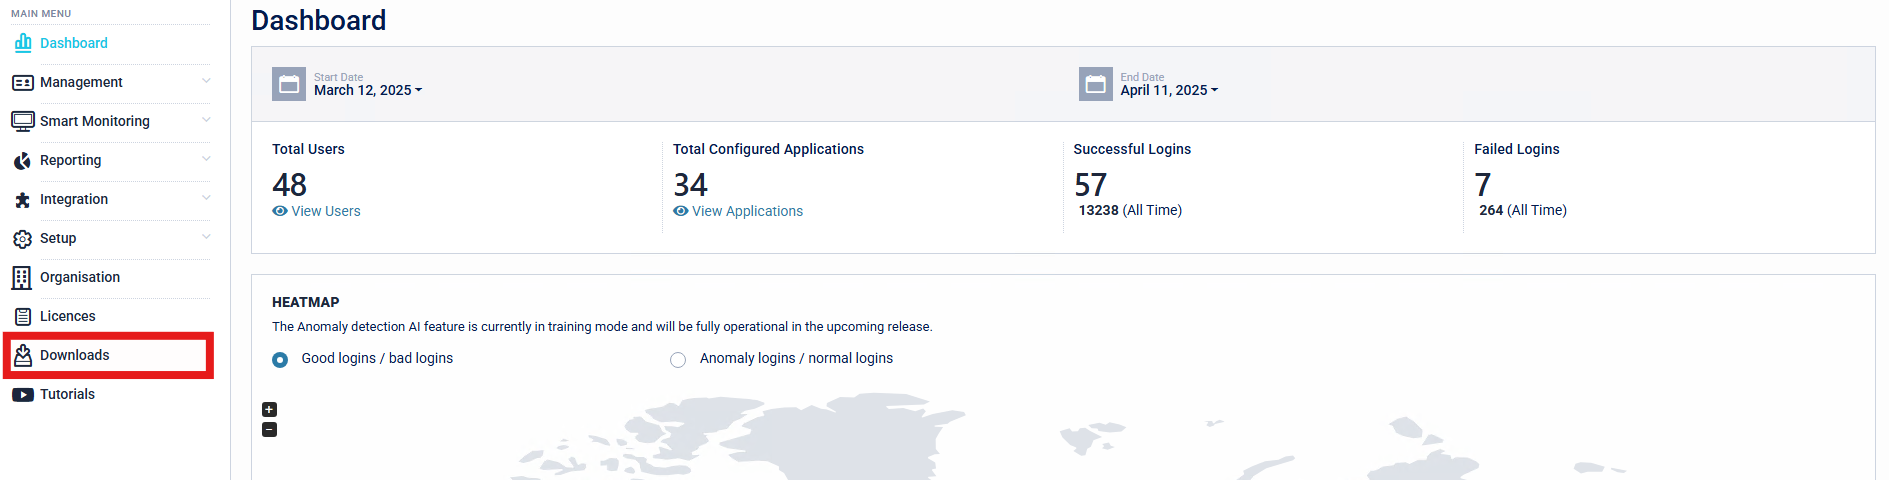
- Download the Windows Login Agent Installer Package.

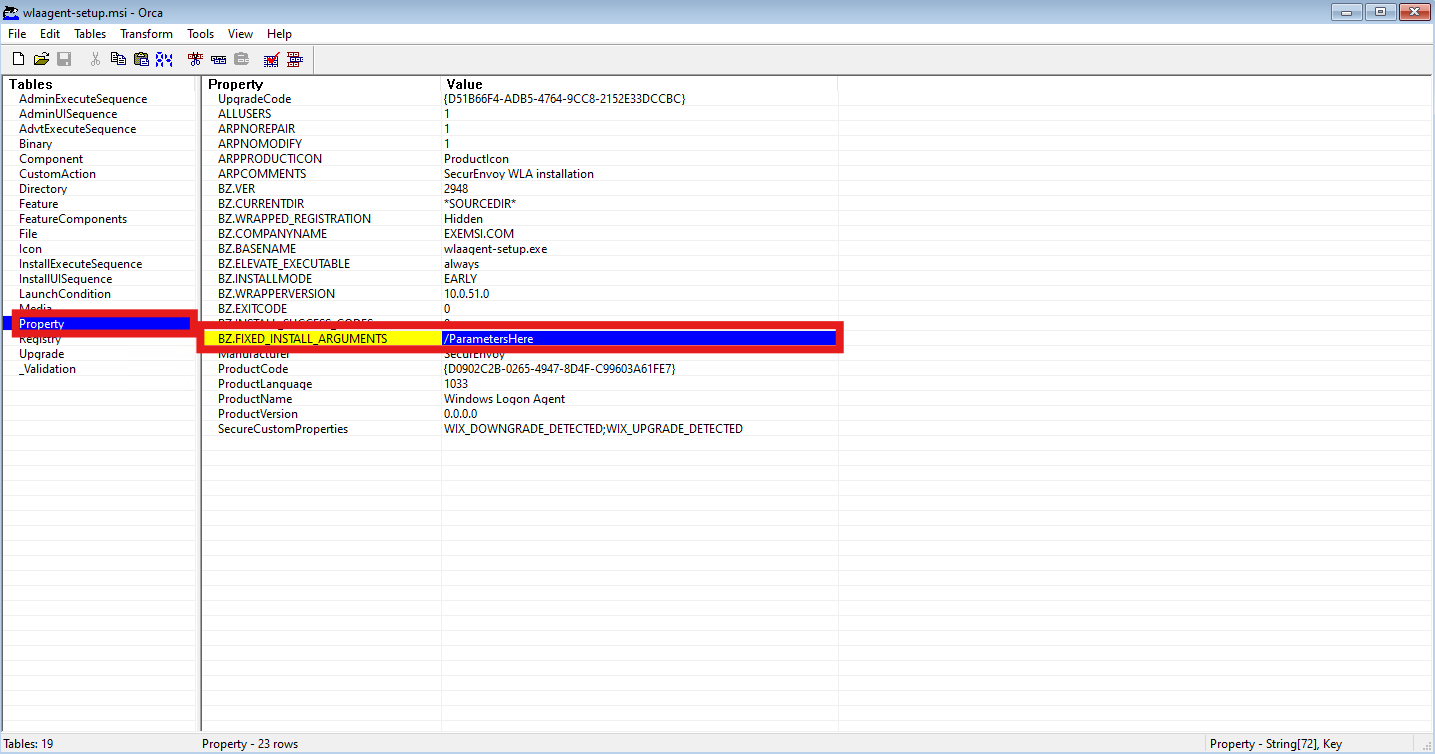
- Using an MSI Editor (Such as Orca.exe), Organisations can modify the Installation Parameters for the Windows Login Agent, to create a silent, mass deployment file. This can also be seen as a gold image, that can be deployed at mass, without user interaction requirement. Navigate to "Property" > "BZ.FIXED_INSTALL_ARGUMENTS", to modify the Value.
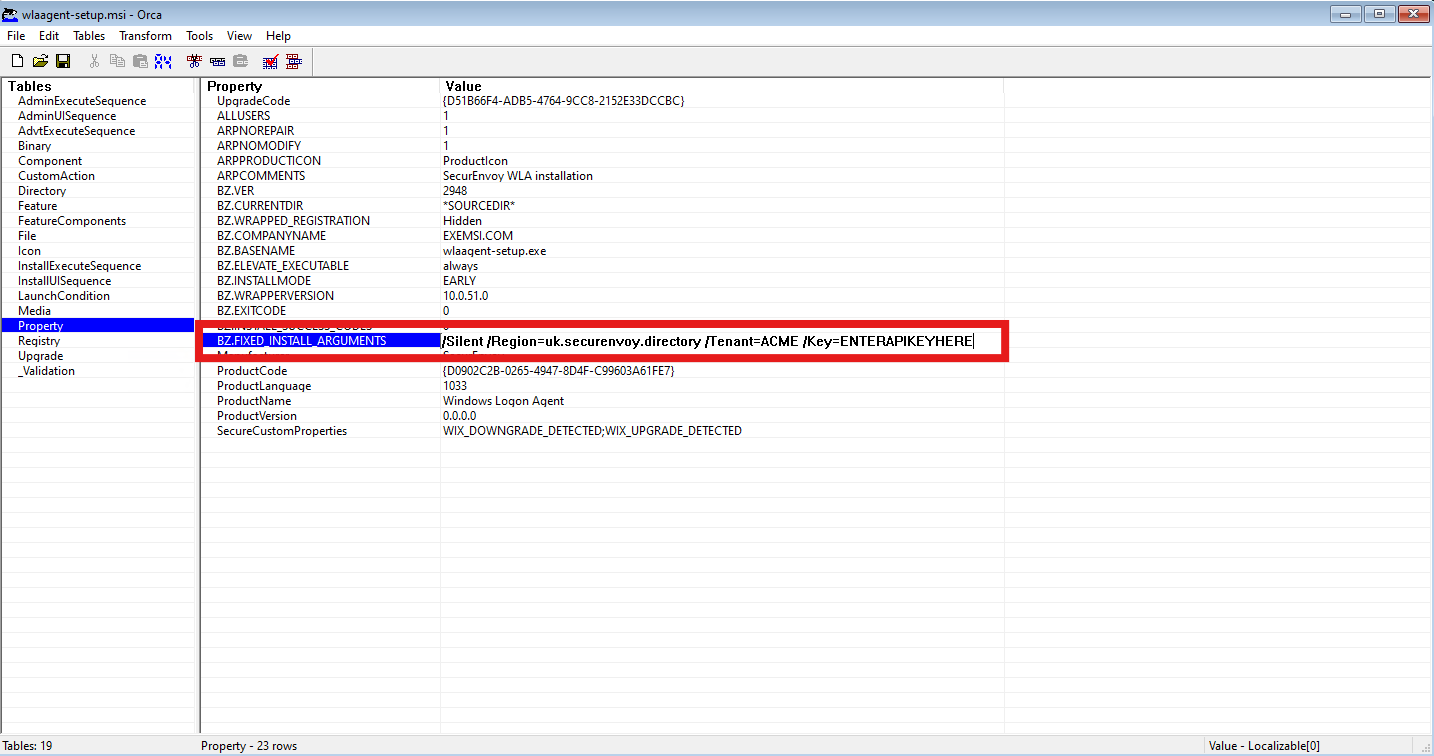
- Fill in Organisation Specific details for the SecurEnvoy Access Management Tenant:
Parameters
-
"/Silent": Install Windows Login Agent as a Silent Installation
-
"/Region": Specify Tenant Region
- "uk.securenvoy.directory": London, UK (TENANT.uk.securenvoy.directory)
- "securenvoy.directory": London, UK (TENANT.securenvoy.directory)
- "eu-west2.securenvoy.directory": Frankfurt, DE (TENANT.eu-west2.securenvoy.directory)
- "us-central.securenvoy.directory": Iowa, US (TENANT.us-central.securenvoy.directory)
- "access-mgmt.directory": (TENANT.access-mgmt.directory)
-
"/Tenant": This is the tenant name of the Access Management Tenant. Organisations can find this information by navigating to "Organisation" > General Details > Tenant on the Access Management Administration Console.
-
"/Key": This is the API Key set up for the Windows Login Agent. If an API Key has not already been set by the organisation, please continue to the next step where API Key generation is shown.
/Silent /Region=uk.securenvoy.directory /Tenant=ACME /Key=ENTERAPIKEYHERE
- Organisations are required to generate an API Key for all agents on the Access Management Platform. This can be generated by navigating to Configuration > API Keys > Add.

SecurEnvoy recommends that organisations create a separate API Key for each agent usage, for example - creating a separate API Key for the Organisations SingleAgent for LDAP Connectivity, and a separate API Key for the Organisations Windows Login Agents.

- Once API Key is generated, Organisations can copy the API Key and store this in a secure place which can be obtained when required. Confirmation is required that the API Key is saved and Organisations are aware that the API Key will not be retrievable in the future.
Organisations are required to back up and save API Keys that are generated, as these are not able to be recovered after closing the prompt. If an API Key is lost and Organisations cannot retrieve this, a new API Key will need to be generated and rolled out. It is therefore very important that these keys be backed up.

API Keys will be displayed in the Access Management Platform with "Type", "Description", "Created" and "Last Used" Information, to give Organisation Administrators an efficient view of API Key's in rotation across the estate.

- Once Parameters have been configured in the MSI Editor, and saved, Organisations can rename the package to a friendly name if desired.
![]()
-
The Windows Login Agent Mass Deployment Package is now configured. Organisations can distribute this to users via the desired Software Deployment Tool, such as Group Policy. The expected outcome is that the login agent is installed without user interaction, as the parameters have already been configured.
-
Installation will extract files to C:\SecurEnvoy\Windows Login Agent, and install Microsoft Visual C++ Redistributable, as this is packaged within the installer and a requirement for the SecurEnvoy Access Management Windows Login Agent.
SecurEnvoy recommends that Administrators install the Windows Login Agent mass deployment package on a test machine to ensure installation is successful, prior to Production rollout. Parameters can be reviewed post-install from the configuration file on the target machine (C:\SecurEnvoy\Windows Login Agent\config.ini).

- Once Installation is complete, the target machine must trigger the Login UI in order to register the Windows Login Agent to the Access Management Platform in the background. This can be achieved by signing out and signing back into the target machine, or restarting the machine.

- After the target machine has triggered the Login UI, this will be registered on the SecurEnvoy Access Management Platform, ready for provisioning.