Cloud Migration
Getting Started
For existing SecurAccess Customers, SecurEnvoy allows migration of authentication methods from the SecurAccess Platform to the Access Management Platform. This means that organisational users will not need to re-enrol their authentication tokens in the Access Management Platform.
Question: Does this tool remove the existing authentication data from SecurAccess?
Answer: No. SecurEnvoy takes a copy of the authentication data in SecurAccess from the LDAP Attributes that are used to store SecurEnvoy Information in the LDAP Directory. The Migration Tool does not remove this data.
Supported Authentication Types:
- SMS.
- Email.
- Soft Token (OTP).
- Hardware Token (OTP).
- PC Soft Token (OTP).
- Mac Soft Token (OTP).
- Yubikey.
- Static Code.
Whilst OTP's are able to be migrated to the Access Management Platform from SecurAccess, due to the URL change for enrolment, users will need to re-enrol on Access Management for Push Authentication to work as expected. As a transitional period, users will be able to log into the platform with their OTP on the SecurEnvoy Authenticator application, until they re-enrol for Push Authentication.
SecurEnvoy Access Management supports real-time OTP for SMS and Email authentication. This means that other authentication options for SMS and Email, such as: Pre-Load, Three Code and Day Code, will be converted into real-time OTP when migrating to SecurEnvoy Access Management.
Downloading and Installing the Migration Tool
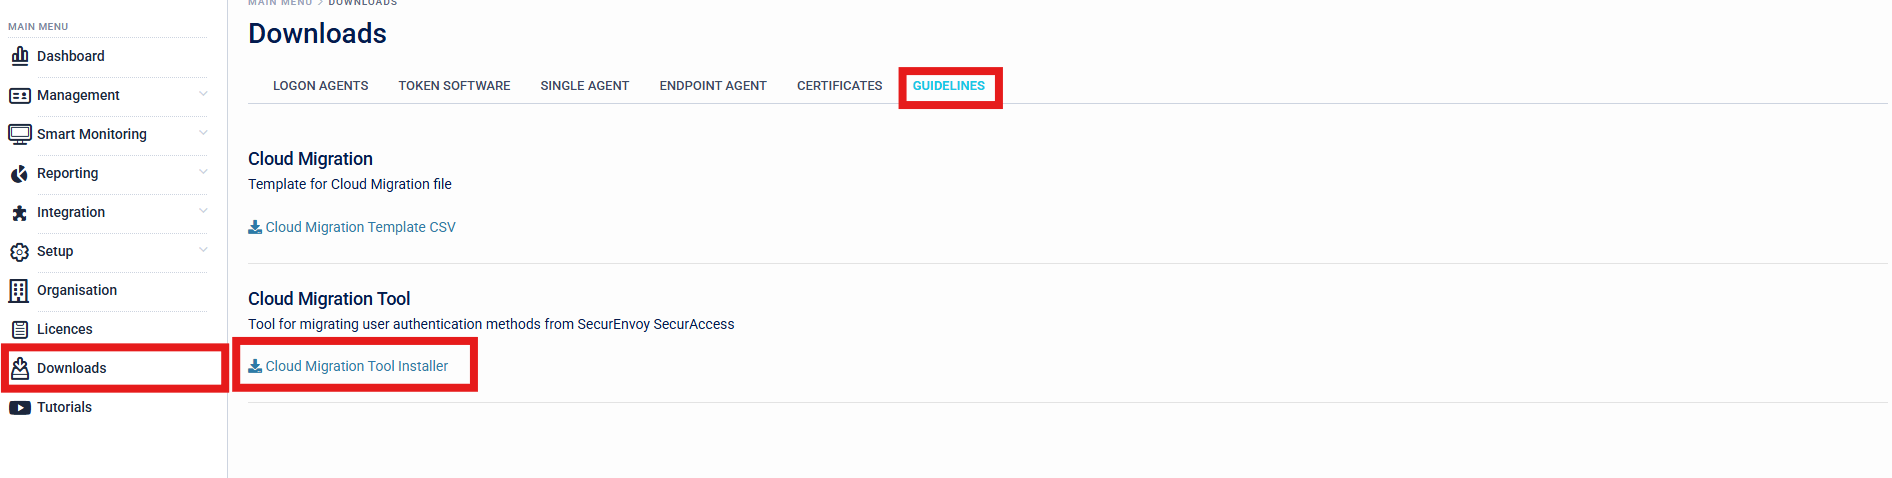
Navigate to "Downloads > Guidelines > Cloud Migration Tool" in the Access Management Administration Console. Download the "Cloud Migration Tool Installer" to an existing SecurAccess Server used within the Organisation.
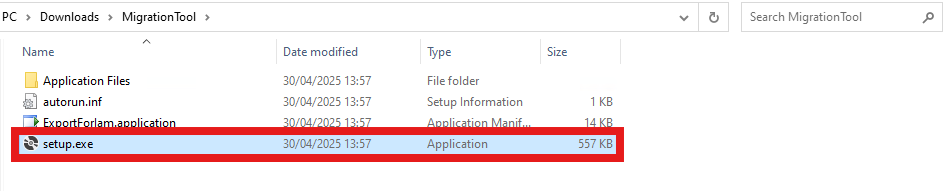
Once Downloaded to the SecurAccess Server, Extract the files from the zip folder, and run the "setup.exe" within the "MigrationTool" directory.
Exporting Authentication Data from SecurAccess
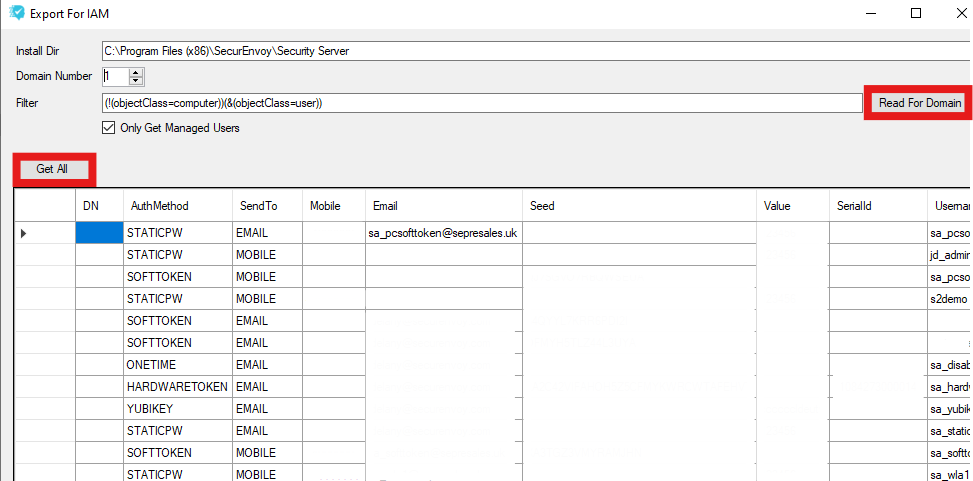
When the installation is complete, the "ExportforIam.exe" will be loaded, which is used to gather the data from the organisations existing SecurAccess configuration.
-
Install Dir This will populated the default Installation Directory for SecurAccess, if the organisations Installation Directory is different, modify this. To verify the Installation Directory for SecurAccess, navigate to Registry Editor (regedit) > Computer\HKEY_LOCAL_MACHINE\SOFTWARE\SecurEnvoy\Security Server\InstallDir.
-
Domain Number For multi-domain organisations, the Migration Tool works on a per-domain basis. Multiple files can be imported to the Access Management Platform if multiple domains are being migrated from SecurAccess. To verify the domain number, navigate to the SecurAccess Administration Console > Domains > Domain Number.
-
Filter This is the LDAP Filter used to search for user objects in the LDAP Directory. A generic filter can be populated by the "Read for Domain" button, which will work for most organisation setups.
-
Get All This will get all users with SecurEnvoy Data populated, based on the Filter specified.
-
Export This will export the authentication data to a CSV file, ready to import to the Access Management Platform.
![]()
Importing Authentication Data to Access Management
Please ensure that users have been imported into the Access Management Platforms Universal Directory, prior to following this part of the document. For more information, please see the Integration section of this document to help with setup of the directory connection of choice.
Once the CSV has been exported from the Migration Tool, the file is now ready to be imported in SecurEnvoy Access Management.
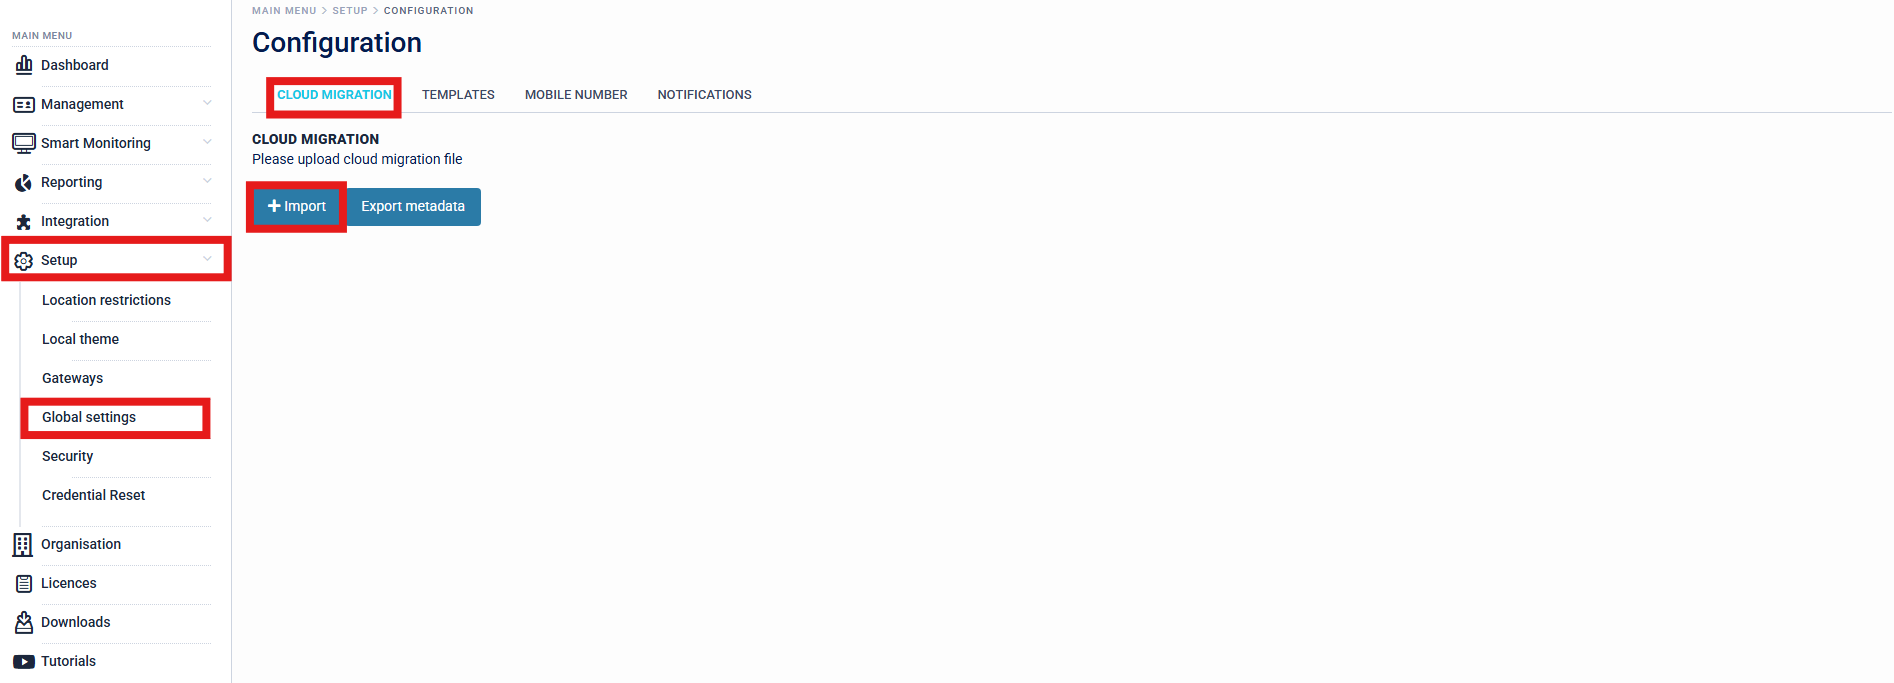
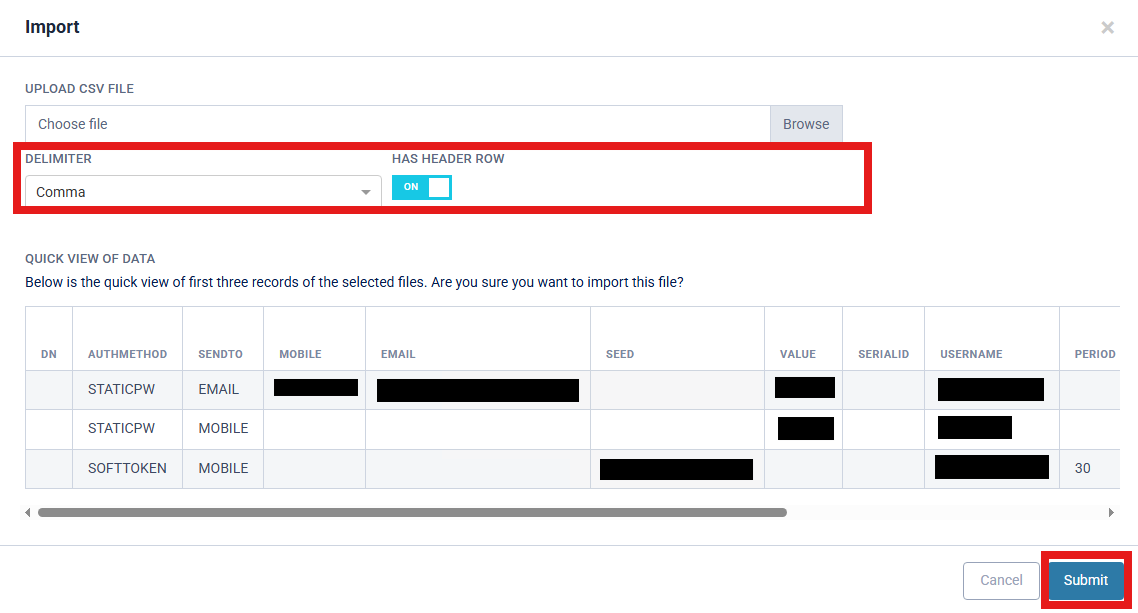
Start by navigating to Setup > Global Settings > Cloud Migration in the Access Management Administration Console. Click the "Import" button, to import the CSV file.
In the column mapping section, ensure that "Has Header Row" is ticked, which is the default for the Migration Tool Document. Please also ensure that the delimiter is correct. "Comma" delimited is the default for the Migration Tool Document.
Review the Quick View of Data to ensure that this looks correct, before submitting the data.
The organisation should now see authentication data populated to the users in the Management > Users section of the Access Management Platform, when looking at the "MFA" column.