Endpoint Agents
Overview
The SecurEnvoy Endpoint Agent for the Access Management Platform can be used as an additional agent that can be installed on Windows or Debian-based Linux machines, to provide extra information for the Conditional Access Policy Engine.
Installing the Endpoint Agent on a target machine will allow organisations to make more decisions about how users are authenticating to their resources, and make more intuitive decisions on these flows by incorporating machine identification attributes, such as machine name, joined domain name, operating system version or family or even by looking at the presence of the endpoint agent being installed on the requesting device.
Installation
This section will demonstrate how organisations can download, and install the Endpoint Agent.
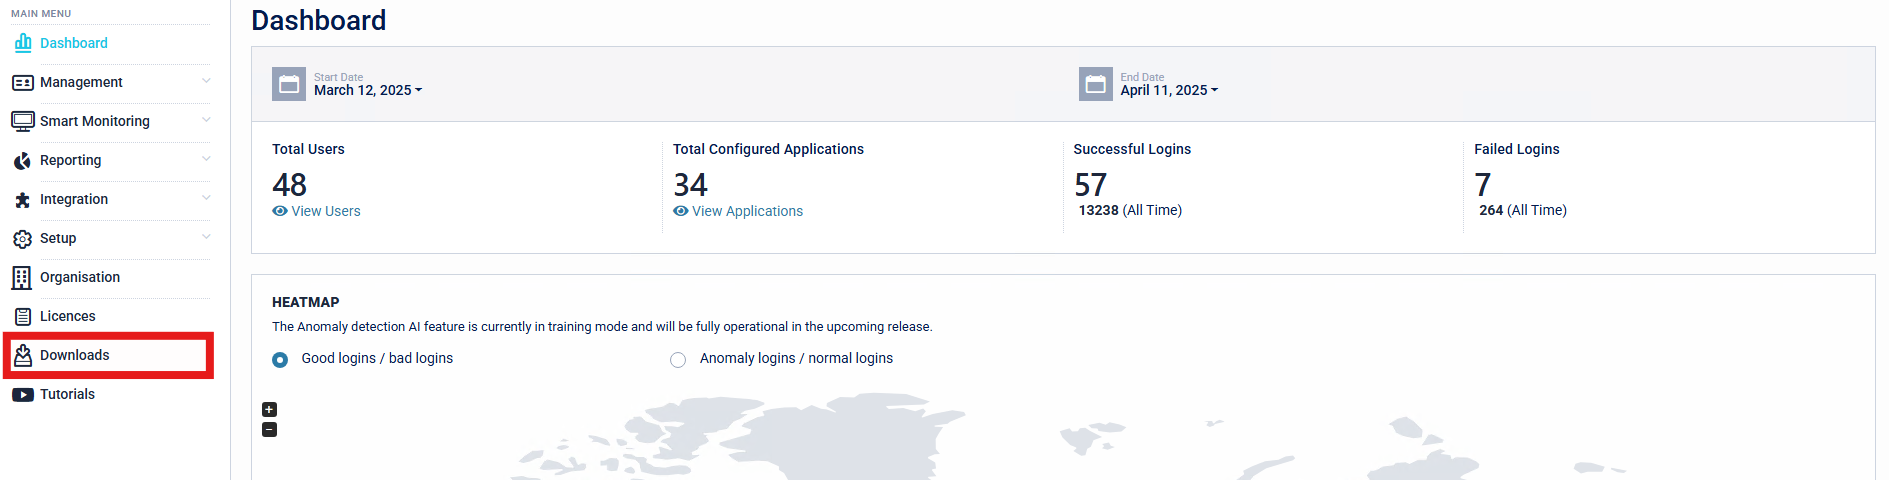
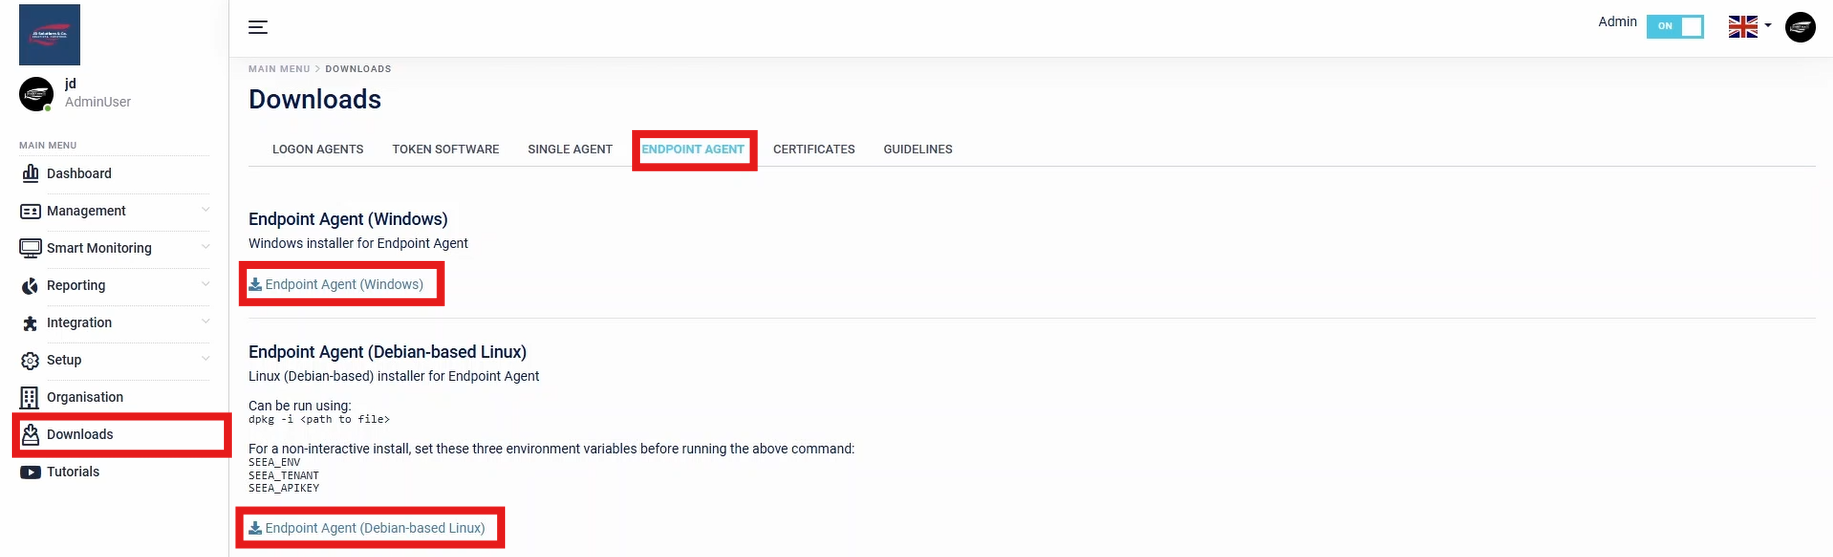
- Navigate to the Downloads section of the SecurEnvoy Access Management Administration Console.
- Download the Endpoint Agent Installer Package, either for Windows or Debian-based Linux.
- Install the Endpoint Agent Installer Package to the desired target machine.
![]()
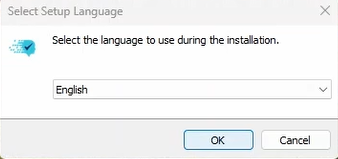
- Specify the language to use during the installation.
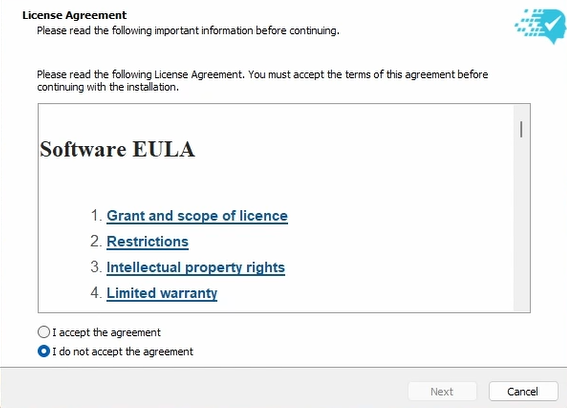
- The organisation must now read the Software EULA Agreement. This must be accepted in order to continue with the installation.
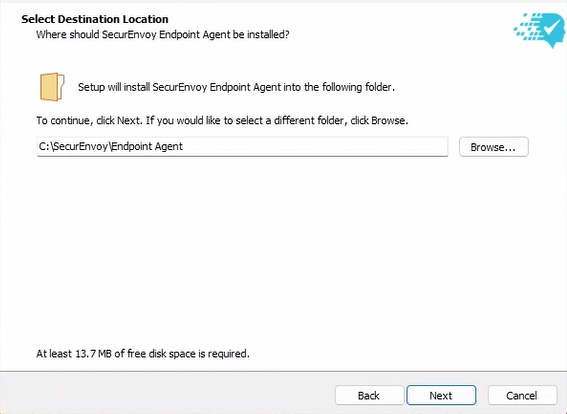
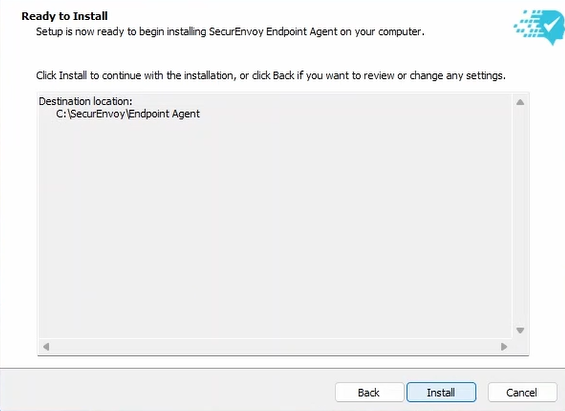
- Organisations are required to select a Destination Location for the Endpoint Agent to be installed. The default is "C:\SecurEnvoy\Endpoint Agent".
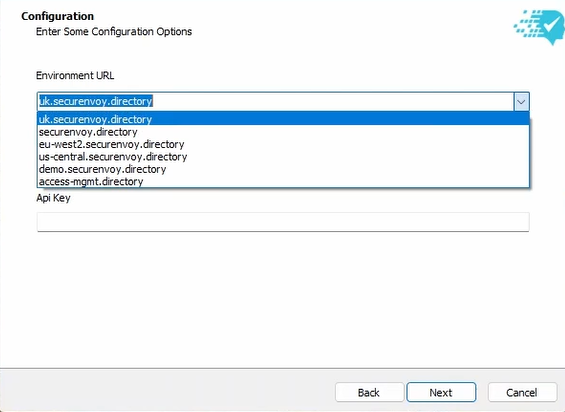
- Fill in Organisation Specific details for the SecurEnvoy Access Management Tenant.
Tenant Regions
- "uk": London, UK (TENANT.uk.securenvoy.directory)
- "uk2": London, UK (TENANT.securenvoy.directory)
- "eu-west2": Frankfurt, DE (TENANT.eu-west2.securenvoy.directory)
- "us-central": Iowa, US (TENANT.us-central.securenvoy.directory)
- "demo": London, UK (TENANT.azuredemo.mysecurenvoy.com)
- "on-premises": (TENANT.access-mgmt.directory)
Tenant Name This is the tenant name of the Access Management Tenant. Organisations can find this information by navigating to "Organisation" > General Details > Tenant on the Access Management Administration Console.
API Key This is the API Key set up for the Endpoint Agent. If an API Key has not already been set by the organisation, please continue to the next step where API Key generation is shown.
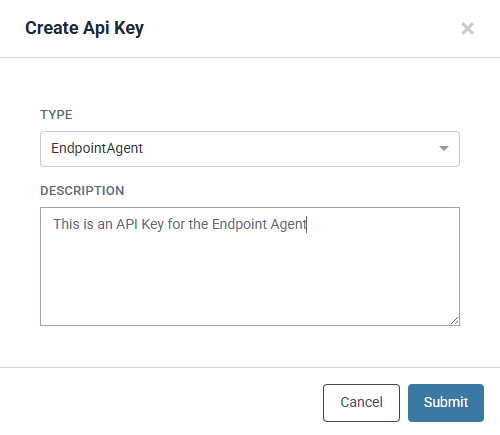
- Organisations are required to generate an API Key for all agents on the Access Management Platform. This can be generated by navigating to Configuration > API Keys > Add.

SecurEnvoy recommends that organisations create a separate API Key for each agent usage, for example - creating a separate API Key for the Organisations SingleAgent for LDAP Connectivity, and a separate API Key for the Organisations Endpoint Agents.
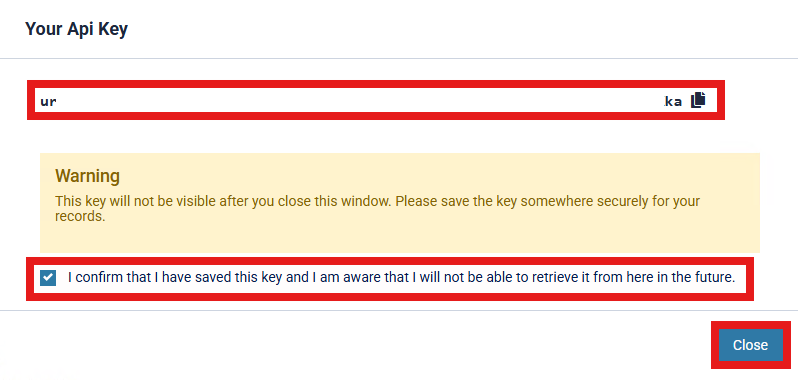
- Once API Key is generated, Organisations can copy the API Key and store this in a secure place which can be obtained when required. Confirmation is required that the API Key is saved and Organisations are aware that the API Key will not be retrievable in the future.
Organisations are required to back up and save API Keys that are generated, as these are not able to be recovered after closing the prompt. If an API Key is lost and Organisations cannot retrieve this, a new API Key will need to be generated and rolled out. It is therefore paramount that these keys be backed up.
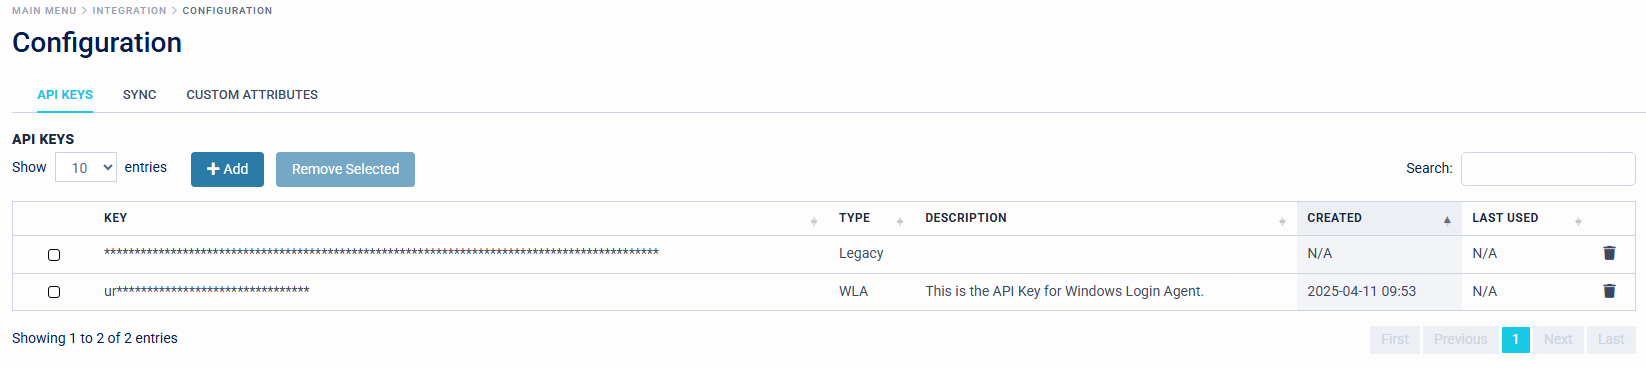
API Keys will be displayed in the Access Management Platform with "Type", "Description", "Created" and "Last Used" Information, to give Organisation Administrators an efficient view of API Key's in rotation across the estate.
- Configuration is now complete and the setup is ready to begin installing the Endpoint Agent onto the target Machine. Installation will extract files to C:\SecurEnvoy\Endpoint Agent.
- After the target machine has completed the installation, this will be registered on the SecurEnvoy Access Management Platform, ready to be used.
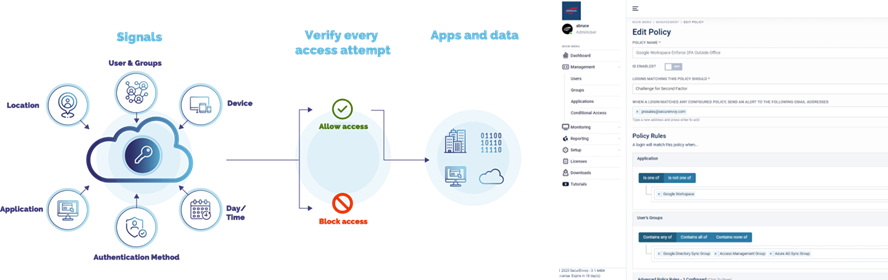
Setting up Conditional Access Policies
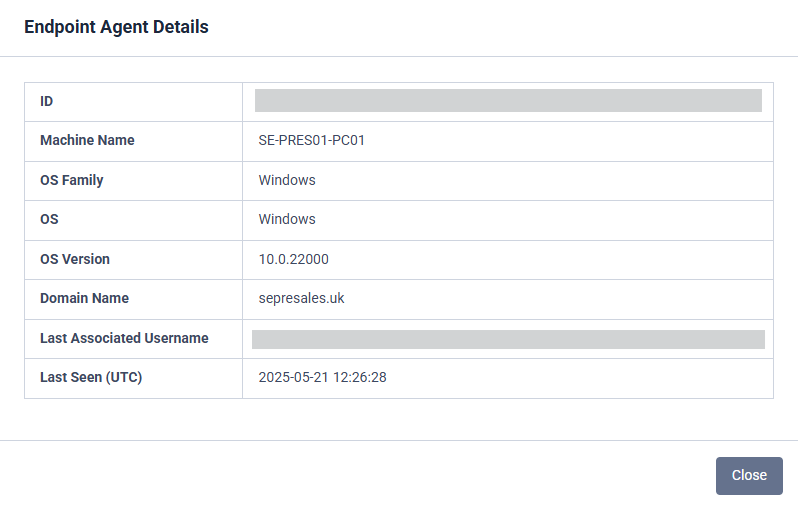
Once the Endpoint agent has completed the installation and have been successfully registered on the SecurEnvoy Access Management Platform, the organisation will be able to see the details around each endpoint on the "Endpoint Agents" section, of the platform. This is unique information that can be used to create Conditional Access Policies.
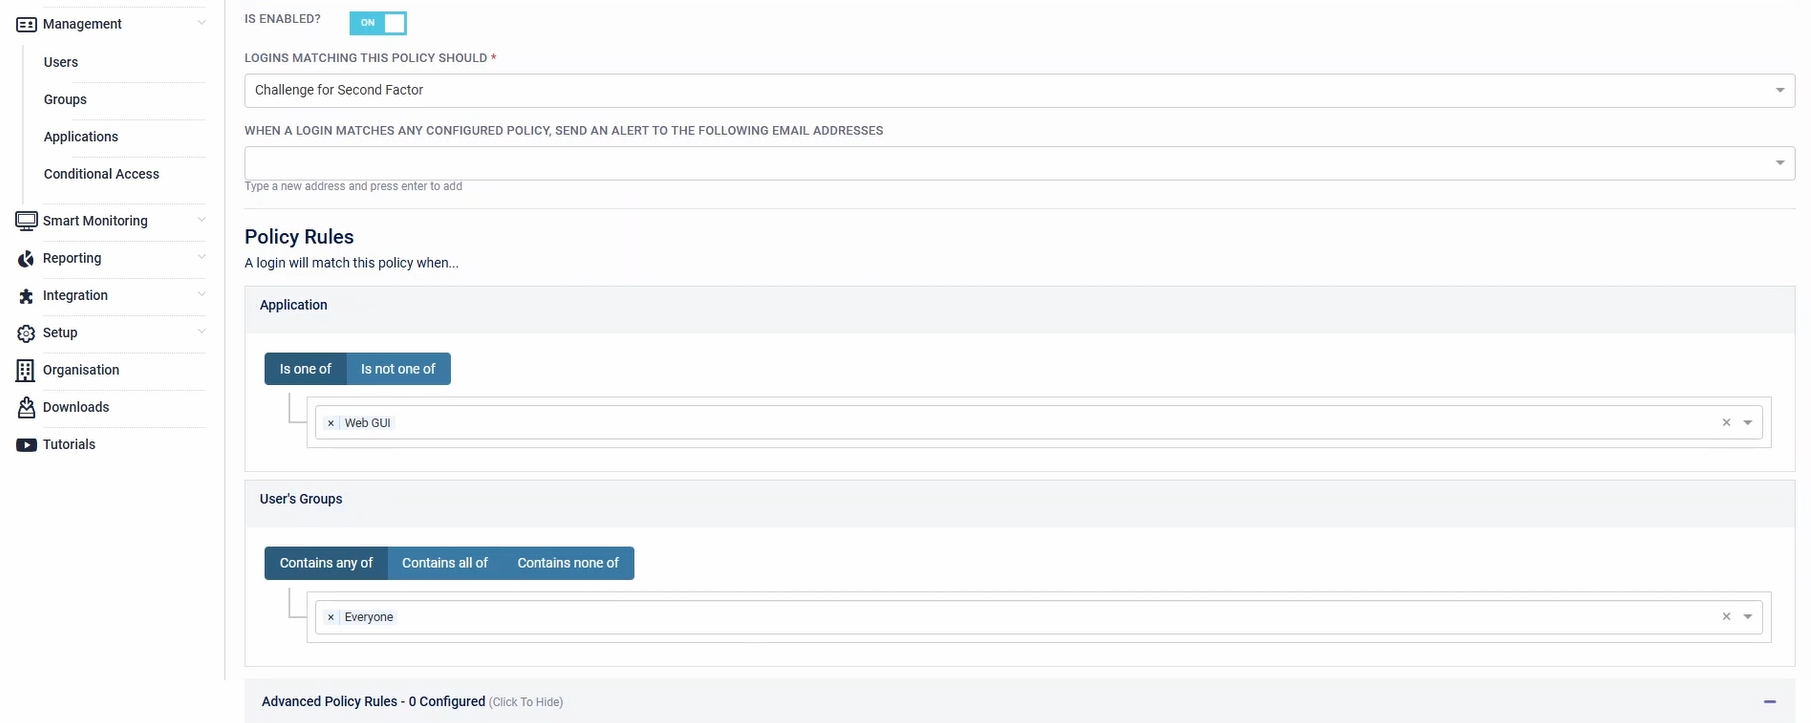
Conditional Access Policies can be created under Management > Conditional Access > Configured Policies > Add Policy.
The Endpoint Agent Conditional Access Policies can always be tested using the "Test Policies" section of Conditional Access.
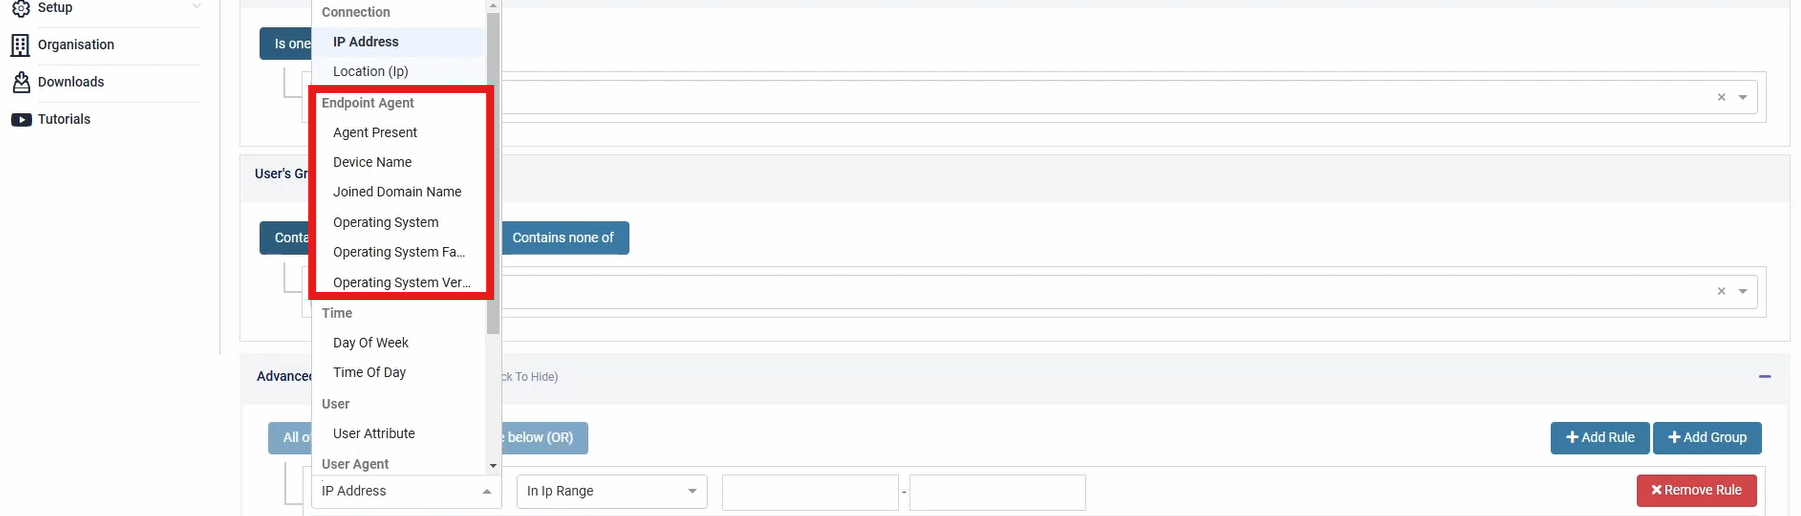
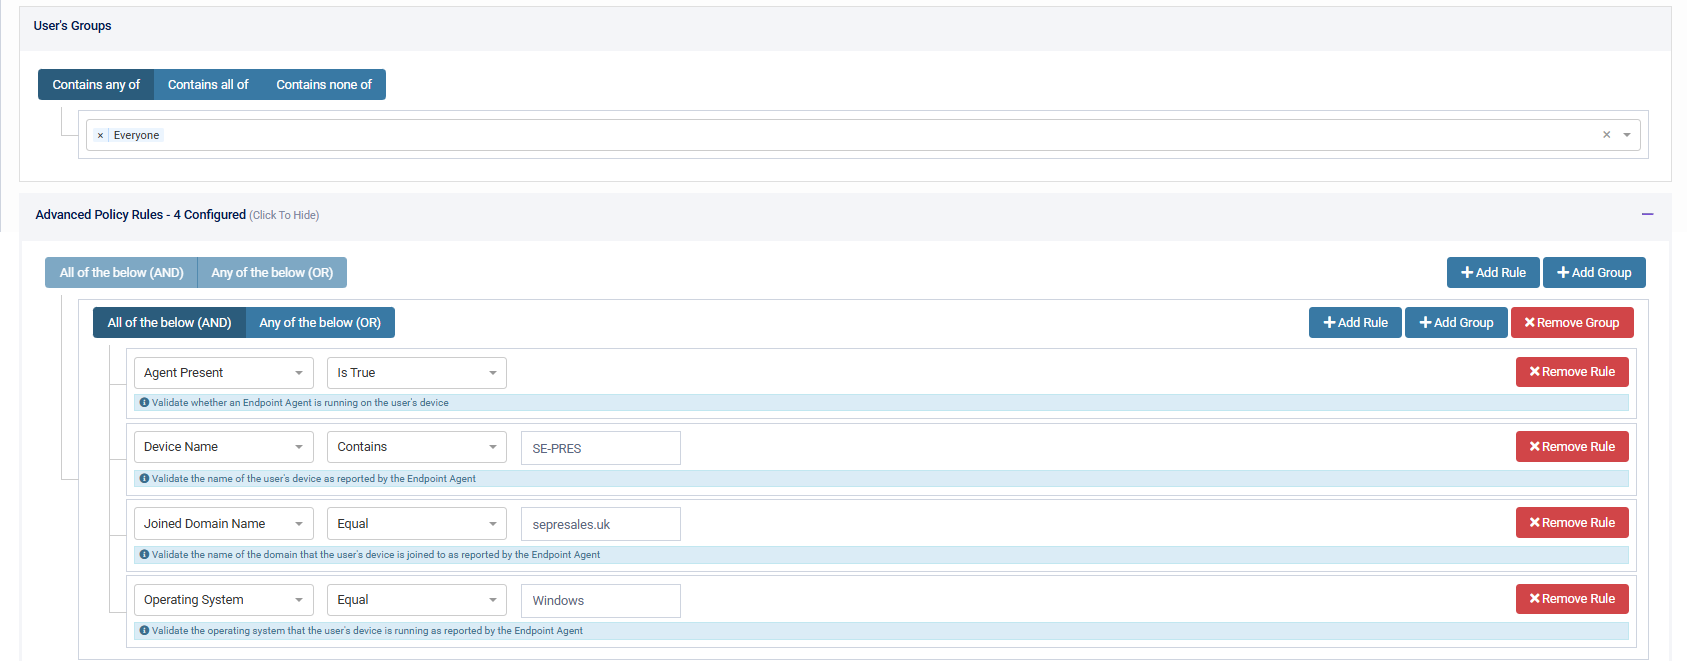
The following parameters can be set up for the Endpoint Agent:
- Agent PresentThis policy can check for the presence of the Endpoint Agent on the machine, against True/False statements. This is particularly useful if organisations are looking to reduce down allowed authentications ONLY to devices that have the SecurEnvoy Endpoint Agent Installed on the target machine.
- Device Name: This policy can restrict to the name of the Device the target machine. This is useful if Organisations are looking to reduce authentications to a certain device naming scheme, for example ACME-LAP01.
- Joined Domain Name: This policy can restrict to the Joined Domain Name that the machine is part of, for example "ACME.com". This is useful for organisations that wish to reduce down allowed authentications ONLY to users who are part of the Joined Domains that are specified.
- Operating System: This policy can restrict the Operating System that the target machine is running for authentication, for example "Windows".
- Operating System Family: This policy can restrict the Operating System Family that the target machine is running for authentication, for example "Windows".
- Operating System Version: This policy can restrict the version of Operating System that is being used.
Testing Conditional Access Policies
This section will demonstrate utilising the Endpoint Agent to trigger multiple Advanced Policies on the Conditional Access Policy Engine.
A Conditional Access Policy has been set up, to Allow Users who are trying to sign into the Access Management Web GUI, Credential Reset or Office 365 with Multi Factor Authentication (Enforce Second Factor), with Advanced Policies relating to the Endpoint Agent (Agent Presence, Device Name, Joined Domain Name and Operating System).
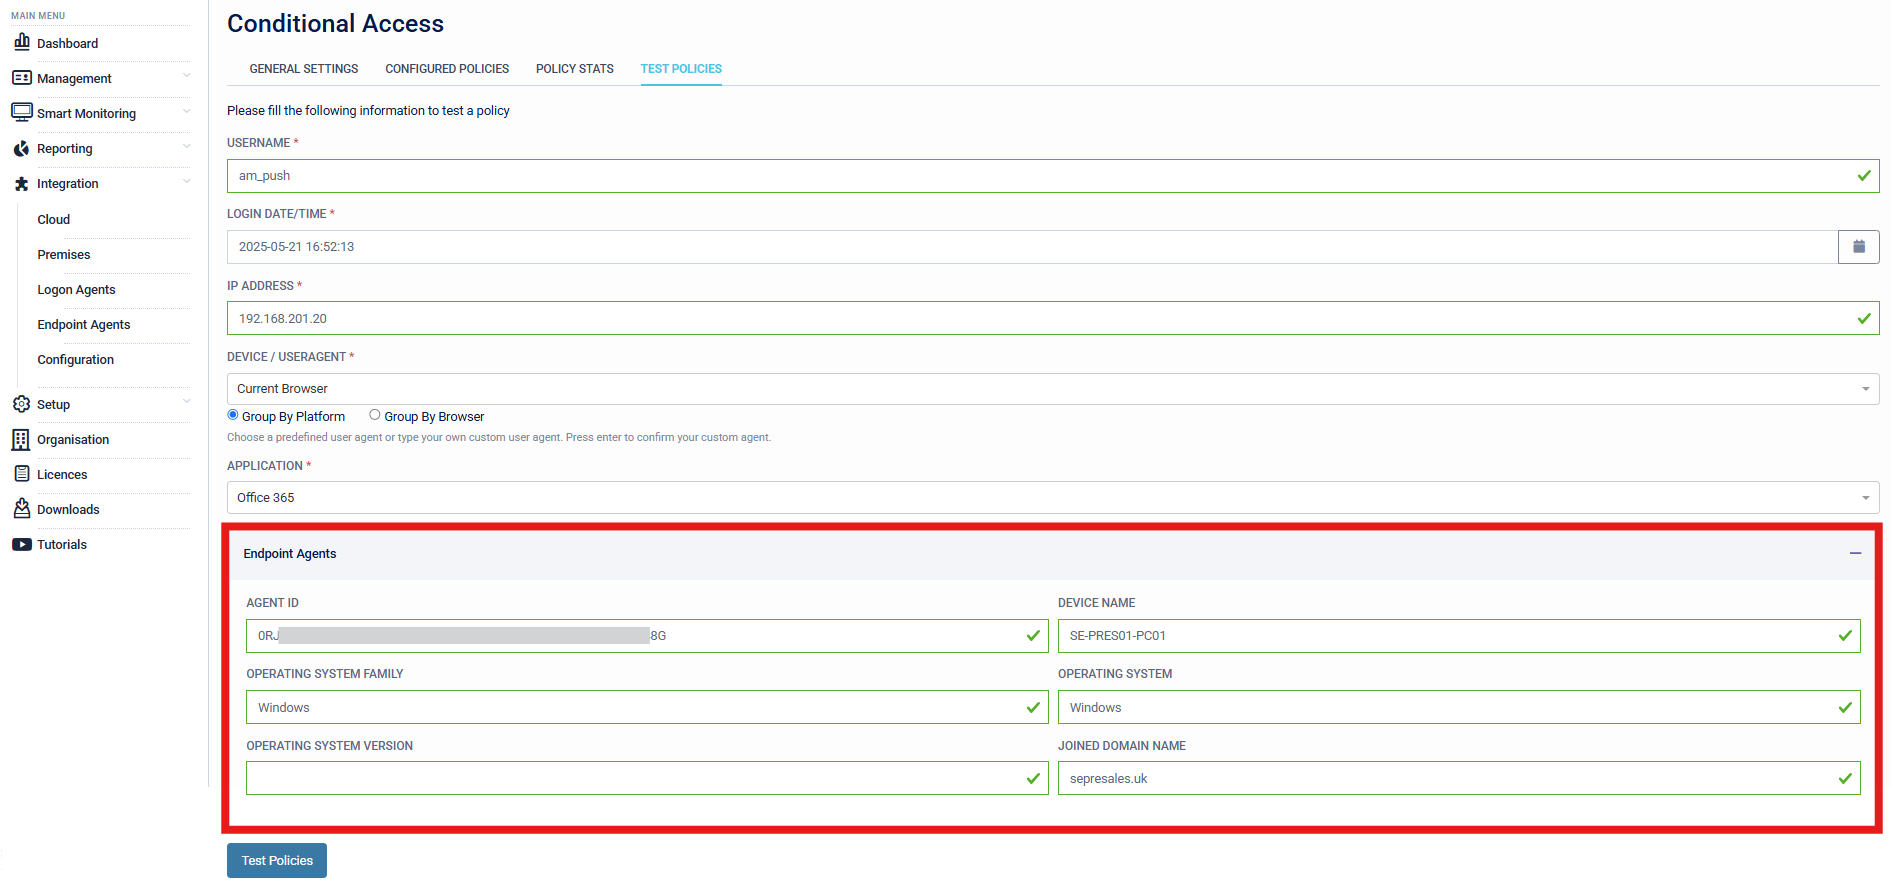
Navigating to the "Test Policies" section of Conditional Access will allow organisations to test policies before rollout. In the example below, user "am_push" is attempting to authenticate with Microsoft Office 365. Additional parameters have also been populated for the endpoint agent to ensure sufficient information is given to trigger the Conditional Access Policy.
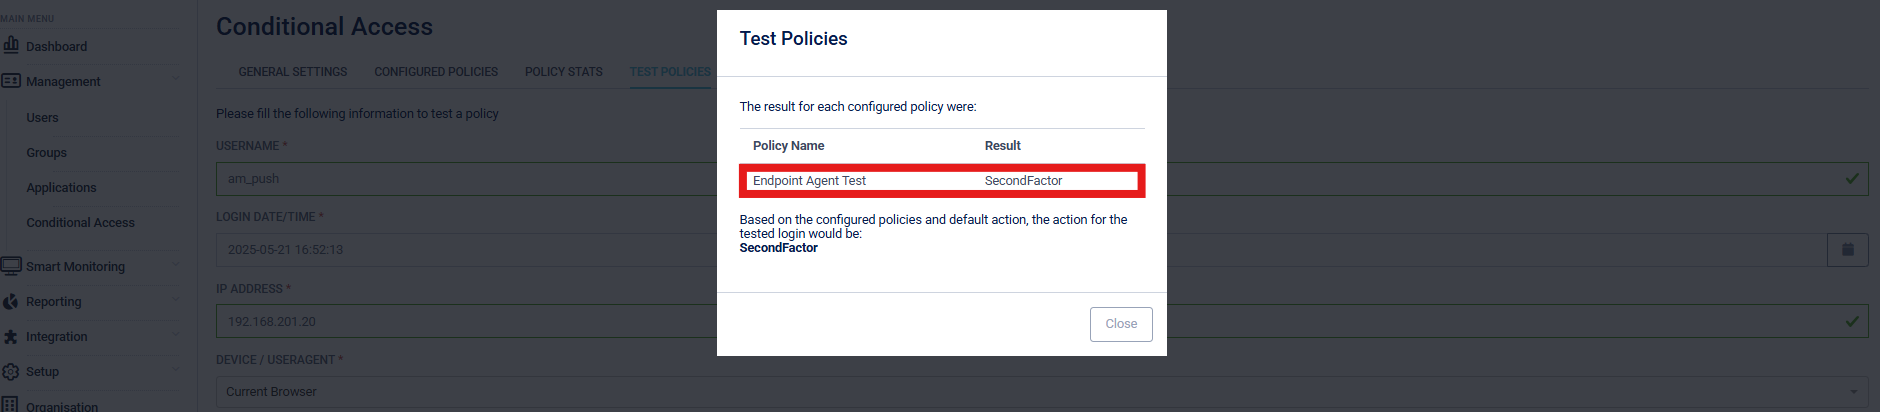
After testing the policy, the Conditional Access Engine has returned that the "Endpoint Agent Test" policy has been triggered, and the expected outcome from the authentication context given is that user "am_push" will be able to sign in using Multi-Factor Authentication. This was the expected outcome.
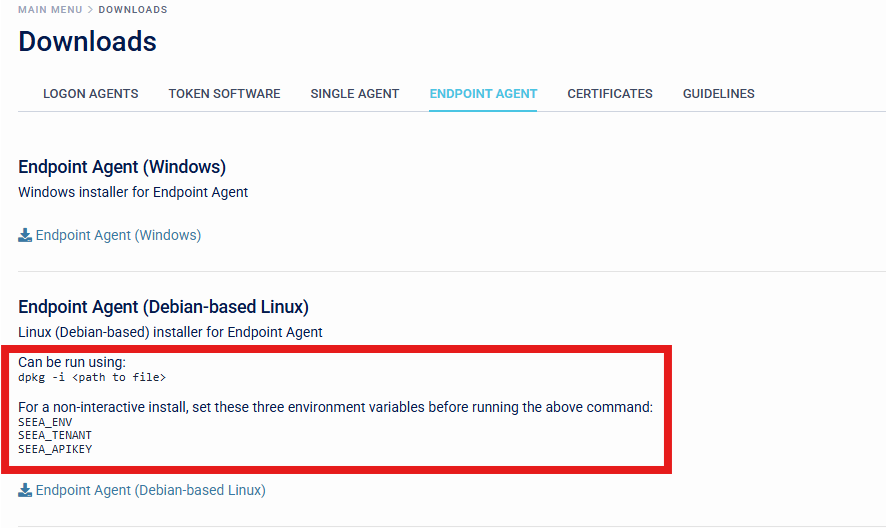
Mass Deployment Options
Mass Deployment is available for organisations wishing to use the Debian-based Linux Distribution, by running the dpkg -i <path to file> command and setting the following three environment variables before running the command.
-
"SEEA_ENV"
Tenant Regions
- "uk": London, UK (TENANT.uk.securenvoy.directory)
- "uk2": London, UK (TENANT.securenvoy.directory)
- "eu-west2": Frankfurt, DE (TENANT.eu-west2.securenvoy.directory)
- "us-central": Iowa, US (TENANT.us-central.securenvoy.directory)
- "demo": London, UK (TENANT.azuredemo.mysecurenvoy.com)
- "on-premises": (TENANT.access-mgmt.directory)
-
"SEEA_TENANT"
- This is the tenant name of the Access Management Tenant. Organisations can find this information by navigating to "Organisation" > General Details > Tenant on the Access Management Administration Console.
-
"SEEA_APIKEY"
- This is the API Key set up for the Endpoint Agent, covered in Step 8 and 9 of the "Installation" section of this document.