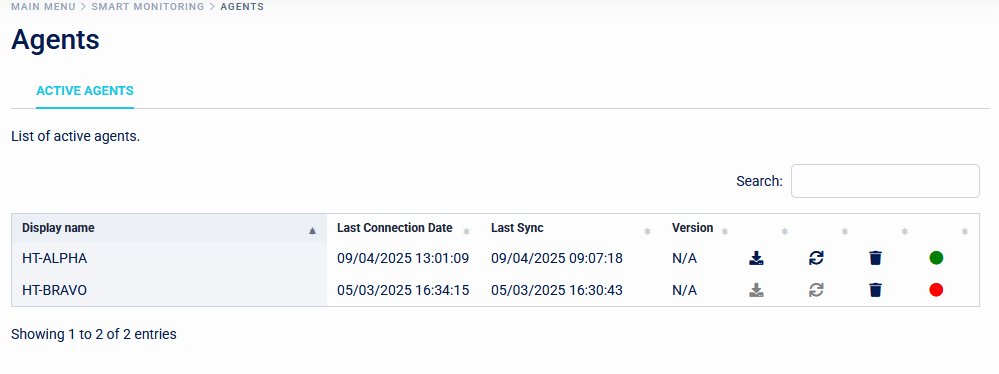
Agents
The Agents page shows all known Single Agents that have been installed. A green dot shows active agents, while a red dot means that an agent can't be reached.
Agents can be updated or removed with the buttons on the right of the list.
The Single Agent is responsible for connecting to Active Directory and LDAP directories for synchronising users. It also connects to RADIUS endpoints.
Selecting an agent in the list will reveal logging from the agent. This logging is split between General logs, AD and LDAP logs, and Radius logs.
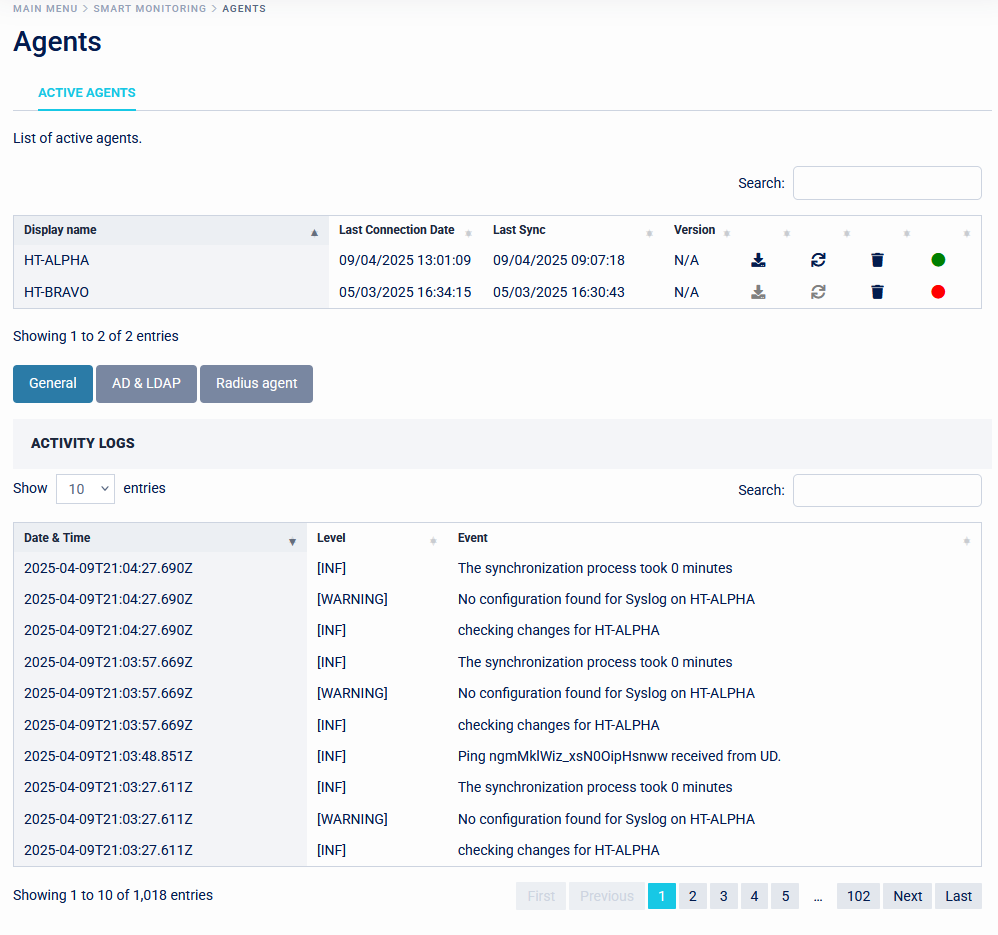
Each event in the log show the category that it belong to, the event categories logged can be set on the agent by opening the appsettings.json file in the Single Agent installation directory and setting the "MinimumLevel": line near the top of the file. By default this is set to "Information".
Installing the Single Agent
The Single Agent requires that both the .NET Runtime 8 and ASP.NET Core Runtime 8 are installed.
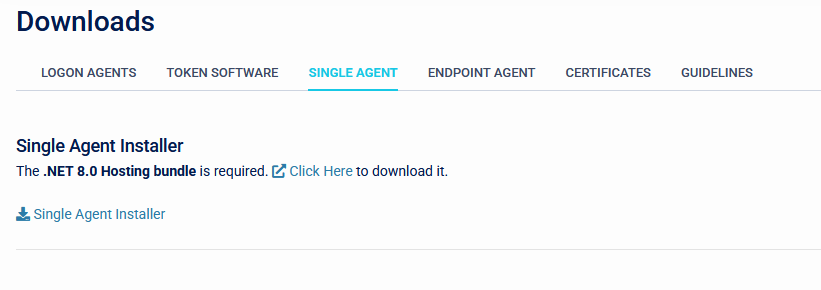
An easy way to install these is the .NET 8 Hosting Bundle.
- The Single Agent can be downloaded from the Downloads page. Once the pre-requisites are installed the Single Agent installer can be run.
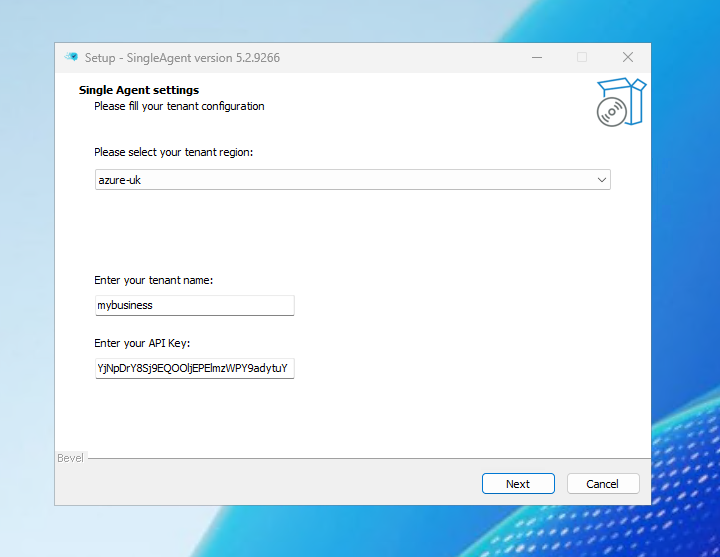
- After choosing the language, the installer will ask for the connection details for the SecurEnvoy tenant. Select the appropriate tenant region from the dropdown list and enter the tenant name (this is the subdomain part of the Access Management URL). The API key is configured under Integration/Configuration.
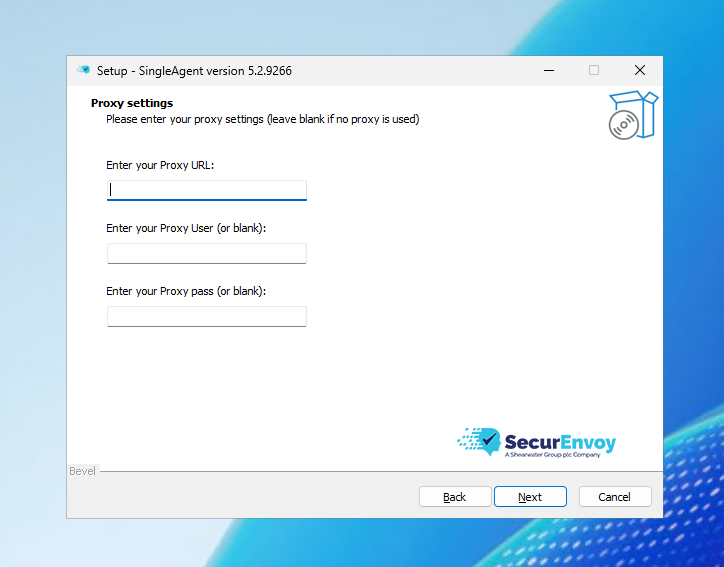
- The next page of the installer allows proxy settings to be configured. This can be left blank if no proxy is in use.
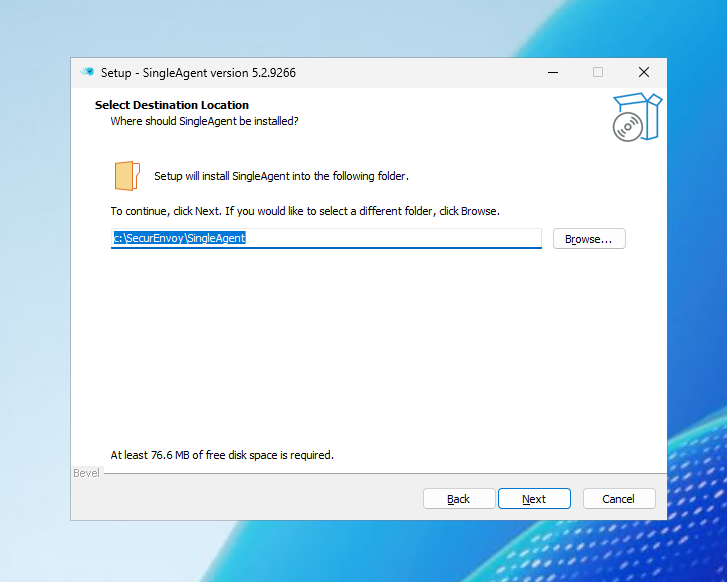
- Finally select the desired installation location. This can be left to its default.
The Single Agent service can optionally be run using a service account to allow updating the agent through the webUI. This account can be a local or domain account and doesn't require any special permissions.